How to Use a Pool Water Tester in 2026?

How to Use a Pool Water Tester in 2026?

A clear pool is not always a balanced pool. Water can look bright while chlorine levels drift or pH moves outside the recommended range. A Pool Water Tester helps reveal these changes before they become harder to manage. In 2026, options include test strips, liquid kits, and digital meters. Each works differently, so the right choice depends on your pool, routine, and comfort with measurements. Small details matter. A damp test strip, an expired reagent, or a rushed reading can lead to misleading results.

This guide explains how to choose and use a Pool Water Tester, read its results, and respond carefully. You will learn when to collect a sample, how to follow the product instructions, and why testing near a return jet may distort a reading. Clean hands and a container rinsed with pool water can help reduce avoidable errors. Still, no test is perfect. That part is easy to forget. We will also cover sensible testing frequency, basic record-keeping, and when a result should be checked again or reviewed by a qualified pool professional. The goal is practical confidence, not false precision: measure consistently, make adjustments according to product guidance, and retest after water treatment. A few minutes at the pool edge can prevent guesswork later.
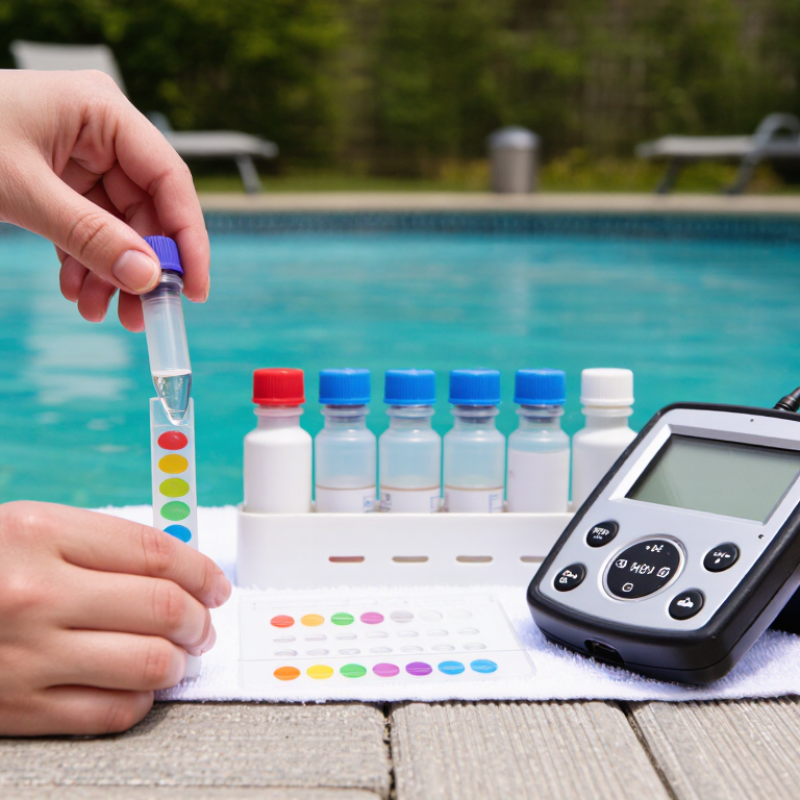
How to Use a Pool Water Tester in 2026?

Choose the Right Pool Water Tester and Check Its Instructions

How to Use a Pool Water Tester in 2026?

Choose a tester that matches the checks you need and the care you can give it. Test strips are quick, while liquid kits may offer separate readings for chlorine and pH. Digital meters can be convenient, but their sensors need proper storage and calibration. Check the package for the readings provided, expiration date, and storage directions. A cheap kit left in a hot shed may give less dependable results. Small detail. It matters.

Read the tester’s instructions before collecting water; methods and waiting times vary. Take a sample from elbow depth, away from return jets and skimmers. Use a clean container if the instructions require one. With strips, keep the marked area submerged for the stated time, then compare colors under natural light. For liquid reagents, count drops carefully and cap each bottle promptly. Digital readings also depend on clean sensors and correct calibration. If a result seems surprising, repeat the test with a fresh sample rather than adjusting chemicals immediately.

Tips: Keep the kit dry, check expiration dates, and record results with the test time. Follow the product’s directions exactly; guessing the wait time is easy, and I would not treat a color match as perfectly precise.

Collect a Water Sample from the Correct Pool Location

How to Use a Pool Water Tester in 2026?

Collect water from a spot that represents the pool, not just the easiest place to reach. A good choice is usually away from return jets, skimmers, steps, and chemical feeders. These areas can have water that differs from the rest of the pool. If possible, sample from the deeper section after the water has circulated.

Use a clean container and collect water about 12 to 18 inches below the surface. Keep it clear of the pool wall and floor. Don’t scoop up floating debris or stir up sediment. Small details matter. A sample taken beside a return jet may give a neat-looking result, but it may not reflect what swimmers are actually exposed to. That is an easy mistake to make when you are in a hurry.

Avoid testing immediately after adding chemicals. Let the pool circulate, then follow the waiting time recommended for your treatment and tester. If you are unsure whether the water has mixed evenly, wait a little longer and collect another sample from a different representative spot. It takes extra time. Still, a careful sample is more useful than a quick reading you cannot quite trust.

How to Use a Pool Water Tester in 2026? — Collect a Water Sample from the Correct Pool Location
Sampling Step Where or How Why It Matters Practical Check
Choose a representative spot Water near an inlet or a recent chemical addition may not yet be evenly mixed. For routine testing, use a similar representative area each time.
Collect below the surface Take the sample about 18 inches (45 cm) below the water surface, or follow the tester’s instructions if they specify a different depth. Surface water can be affected by sunlight, floating debris, and surface-level conditions. Keep the container opening below the surface while filling it.
Avoid the pool edge Reach into the pool rather than scooping water directly beside the wall or steps. Water close to the edge may be less representative of the water circulating through the pool. Choose a safe location that is easy to reach without leaning unsafely.
Use a clean sample container Use the clean vial or container supplied with the test kit. If its instructions permit, rinse it with pool water before collecting the sample. Residue from soap, cleaning products, or another sample can affect test results. Do not touch the inside of the container or its cap.
Test each water body separately Collect separate samples for a pool and a connected spa or other distinct body of water. Separate water bodies can have different circulation, temperature, and chemical readings. Label samples if they are not tested immediately.
Test promptly Measure the sample soon after collection and follow the test kit’s directions for sample volume and timing. Delay, heat, and exposure to sunlight can change some readings. Keep the sample out of direct sunlight while preparing the test.
Record the result Note the date, time, sampling location, and readings, such as pH and free chlorine when included in the test. Consistent records make it easier to spot changes and compare results over time. Use the test kit’s stated units and recommended ranges when interpreting readings.

Test the Sample and Record the Readings

Collect a clean sample from elbow depth, away from return jets and the skimmer. Water near the surface may not represent the whole pool. Use a clean cup, and avoid touching its inside. Small details matter. Test the water soon after collecting it, following the tester’s instructions for sample volume, reagent amount, and wait time. A strip read too early or too late can give a misleading result.

Check the result in good, even light, and hold color charts beside the sample rather than relying on memory. Color can fool you. With a digital tester, confirm that the meter is ready and clean the sensor as directed. Record the date, time, water temperature, and each reading, such as pH and free chlorine. Note recent rain, heavy swimming, or chemical additions; these details can help explain a change. I’ve found that a quick phone note is easier to keep than a loose paper slip, though it is easy to forget the time.

Write down the numbers as shown, including units, and compare them with the tester’s stated range and reliable pool-care guidance. Don’t round a borderline result into a comfortable one. If a reading seems surprising, test a fresh sample again before making changes. A notebook is useful, but it is not proof that the sample or procedure was perfect.

Compare Results with Recommended Pool Water Ranges

How to Use a Pool Water Tester in 2026?
Compare Results with Recommended Pool Water Ranges

A tester gives you numbers; the key is comparing them with suitable ranges. Collect water about elbow-deep, away from return jets and skimmers. Follow the kit’s timing instructions closely. Read strips in good light, since a faded color can be hard to judge. Small detail. Record each result and the time.

For many residential pools, a pH of 7.2–7.8 is a common target. Free chlorine is often maintained around 1–3 parts per million, though the correct level depends on the sanitizer and its instructions. Total alkalinity commonly falls near 80–120 ppm. Calcium hardness targets vary with the pool surface and water conditions, so treat general ranges as guides, not rules. Outdoor pools using stabilized chlorine may also need cyanuric acid, often around 30–50 ppm.

If a reading sits outside its recommended range, avoid making a large correction based on one test alone. Check the kit’s expiration date, retest, and compare the result with your pool’s care guidance. A test taken right after adding chemicals may mislead; let the water circulate as directed before checking again. I would not call every borderline result urgent. Still, it is easy to overlook a pattern when readings are not written down.

Adjust the Water and Retest to Confirm the Changes

How to Use a Pool Water Tester in 2026?
Adjust the Water and Retest to Confirm the Changes

A test result is a starting point, not a cue to pour in several chemicals at once. Check the kit’s instructions, collect water away from return jets, and record the readings. The CDC’s Healthy Swimming guidance recommends pool pH between 7.0 and 7.8, with at least 1 ppm free chlorine in pools without cyanuric acid. Make one measured adjustment at a time, following the product label and your pool’s water volume. Small changes matter.

Let the water circulate for the interval specified by the treatment instructions, then take a fresh sample and test again. Don’t test beside a chemical feeder or immediately after adding treatment; the sample may not represent the pool. If the result moved too far, pause and reassess rather than adding another dose by guesswork. That cautious step can feel slow. It is safer than chasing numbers.

Tips: Keep the tester clean and dry, check reagent expiry dates, and compare colors in bright, indirect daylight. Retest after heavy swimming or rain, too. CDC guidance advises checking chlorine and pH at least twice daily, and more often with heavy use. Note each result and adjustment; a simple log can reveal recurring swings, though it won’t explain every cause.

How to Use a Pool Water Tester in 2026? Adjust the Water and Retest to Confirm the Changes

Example pH readings: The initial reading is above the recommended 7.2–7.8 range. After adjusting the water, allow it to circulate as directed, then test again to confirm the pH is within range. Follow your test-kit and chemical product instructions.

Article Source: